Send emails with your business email (Microsoft)
OnboardMe allows customers who use Office 365 to send emails from their business domain.
To enable this feature, an Azure admin will need to follow the below instructions.
Create an Azure App Registration for OnboardMe
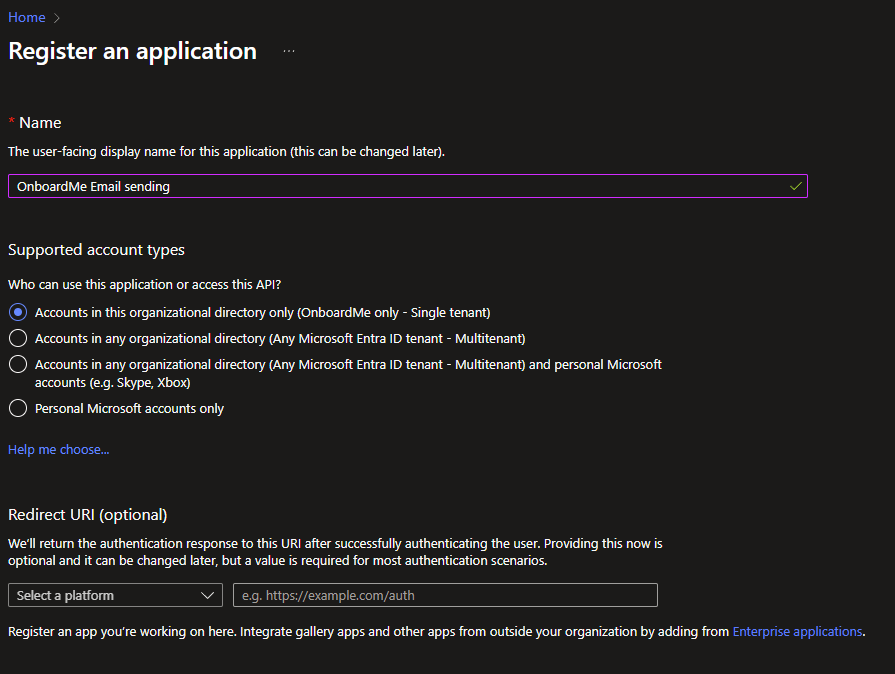
New App's can be created at this URL: Register an application
Give the app a name like "OnboardMe email sending" or something easily distinguishable.
Select the "Accounts in this organizational directory only" option and click Register.
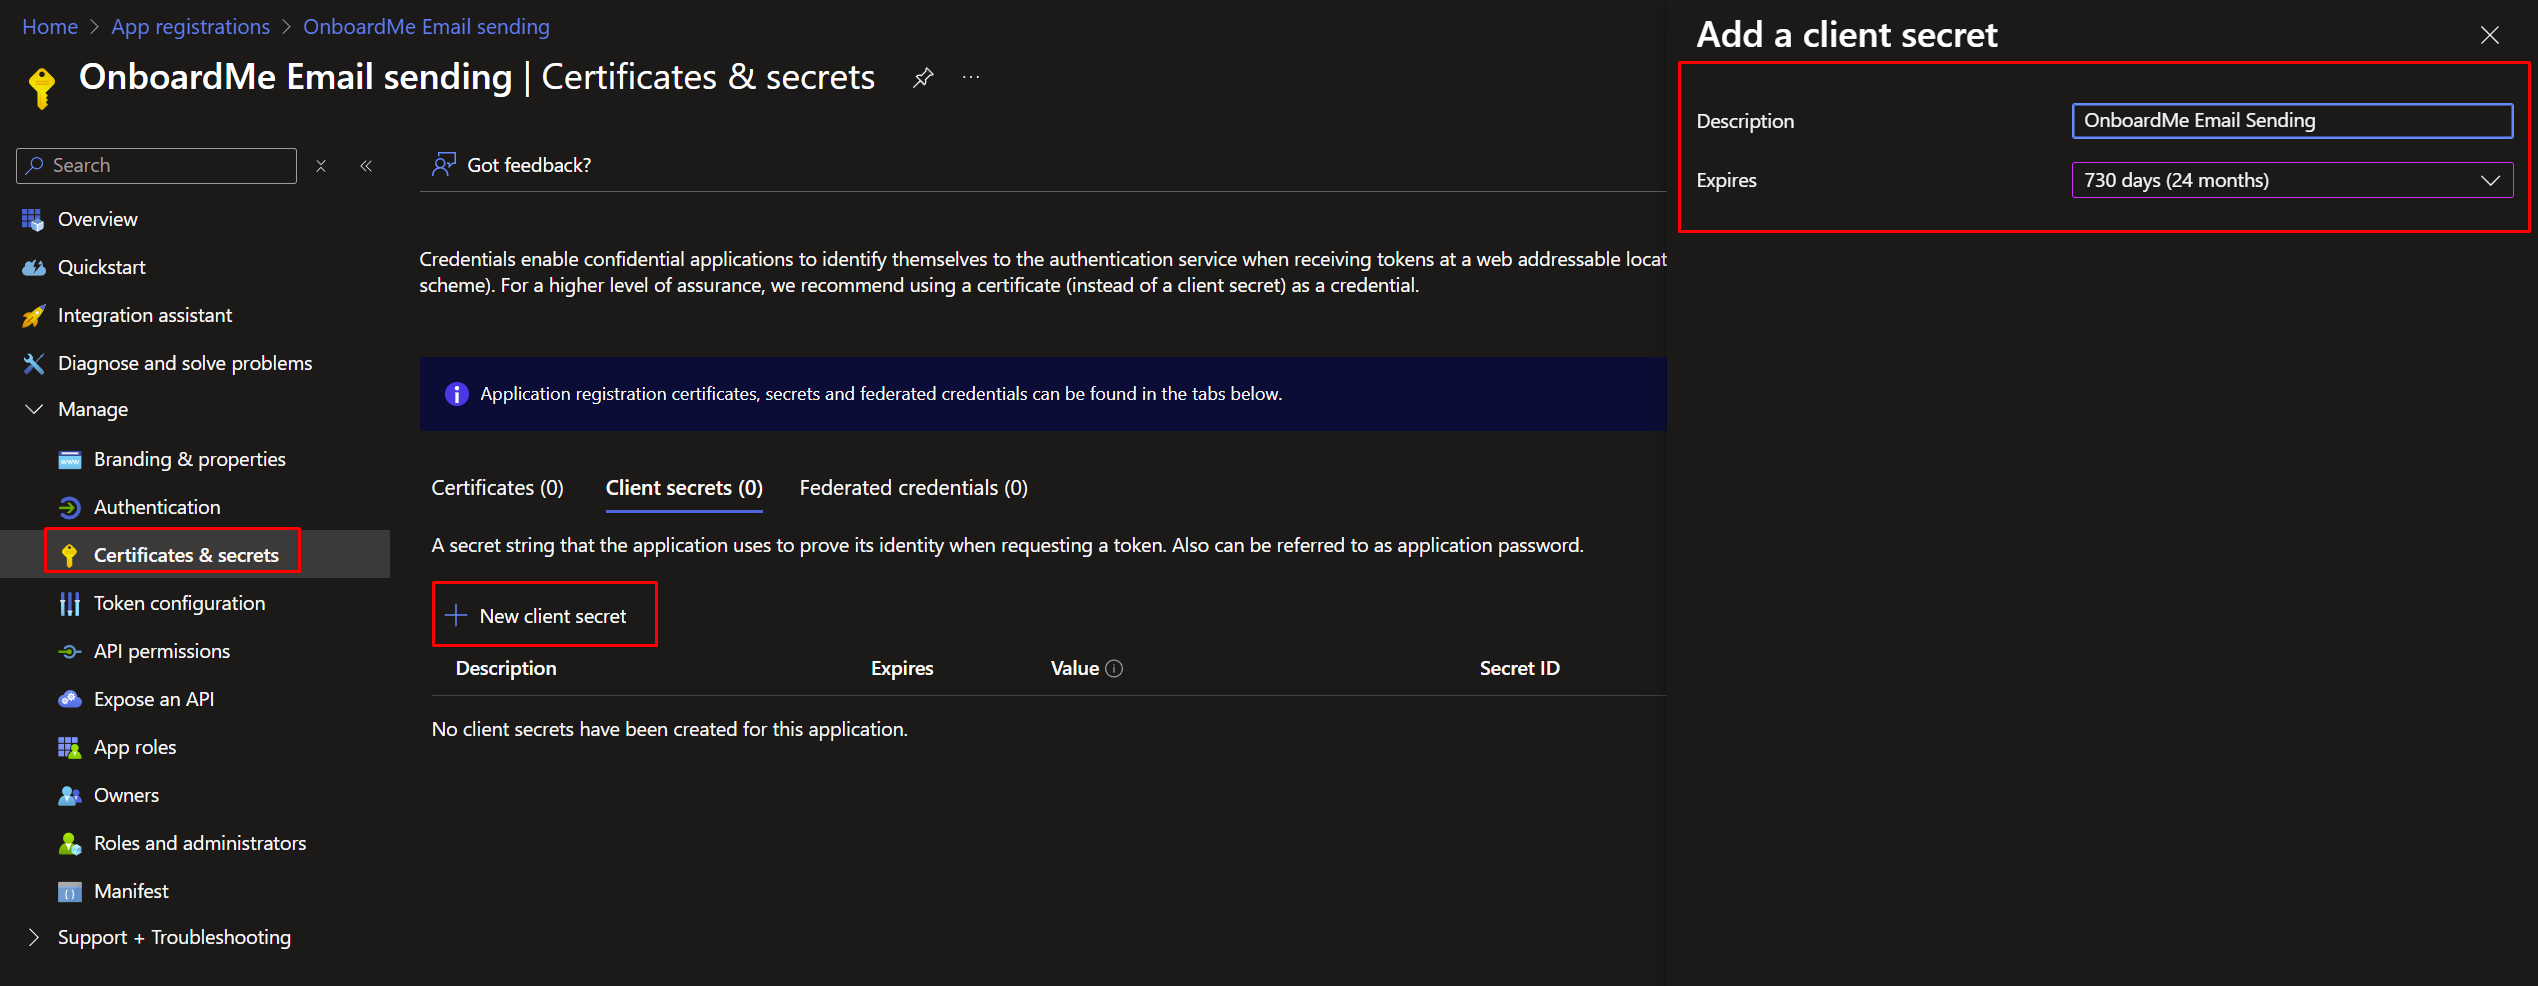
Once created, click the Certificates & secrets menu option and click the "+ New client secret" button.
Give this secret a description and set an expiry. (We suggest making the expiry 730 days (24 months), as when this expires, you will be unable to send emails from your domain).
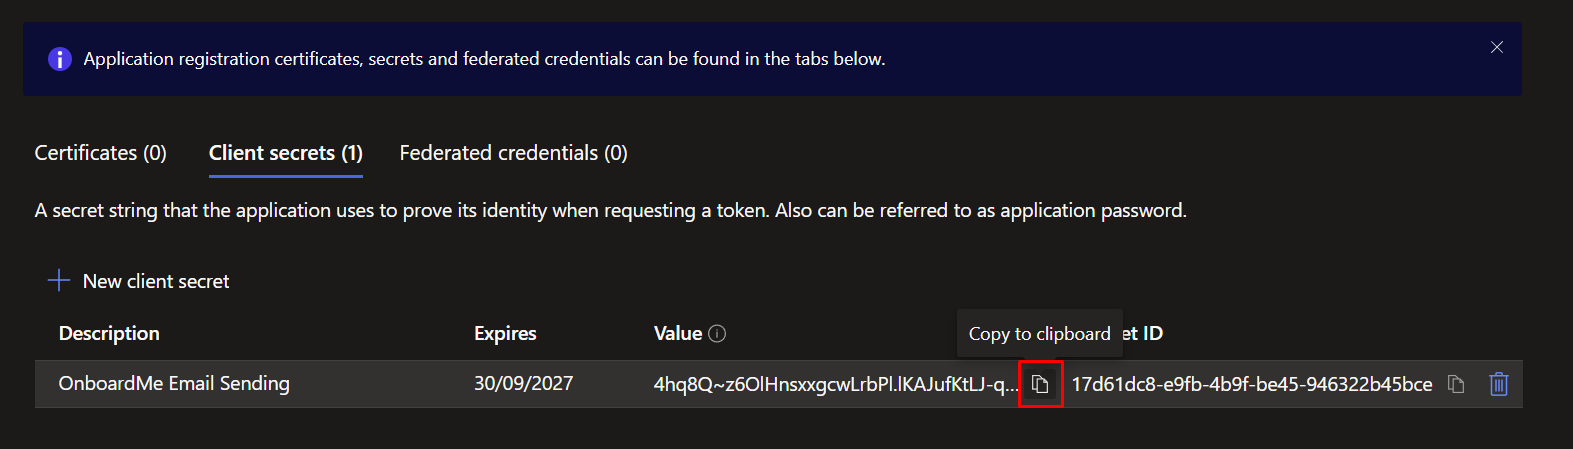
Once a secret has been created, copy the VALUE item for safekeeping to be added into OnboardMe a little later on.
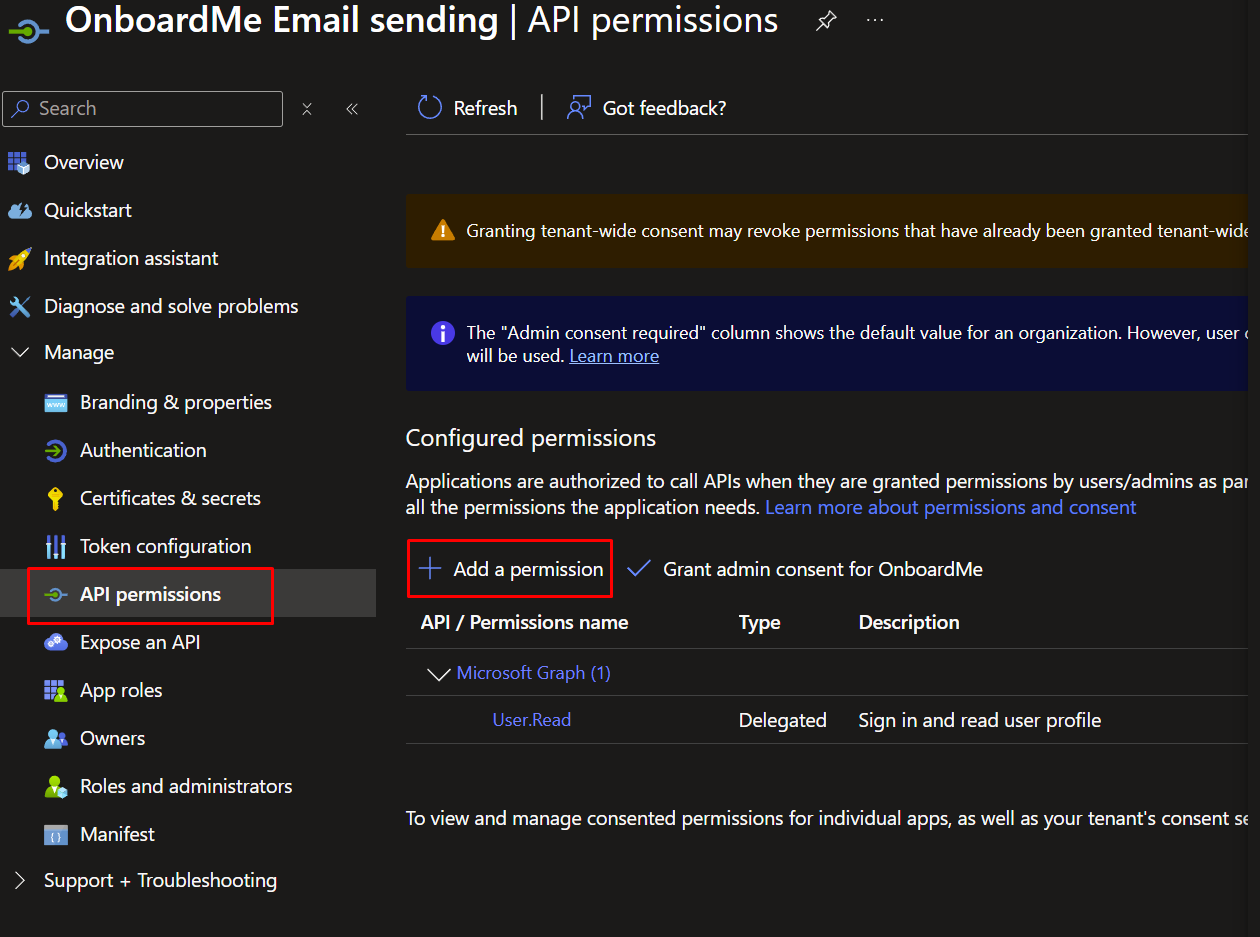
Next, we need to give the application API permissions to send emails.
Click the API Permissions menu option and click "Add a permission".
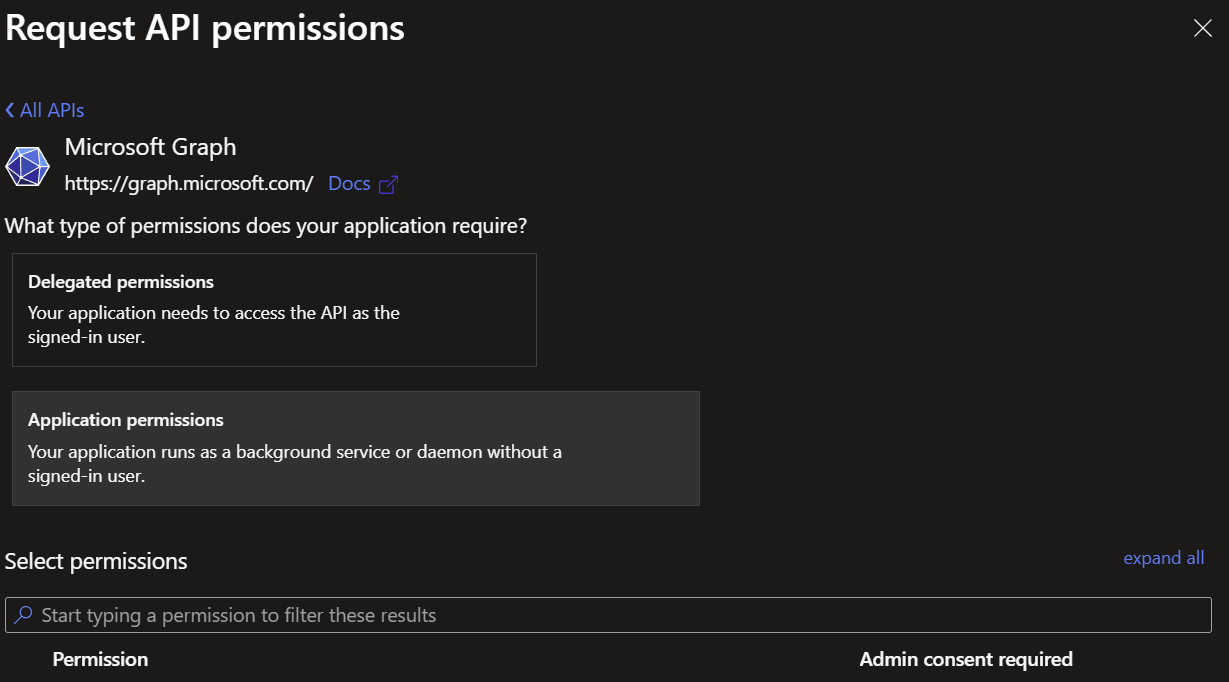
Select Microsoft Graph and select Application permissions.
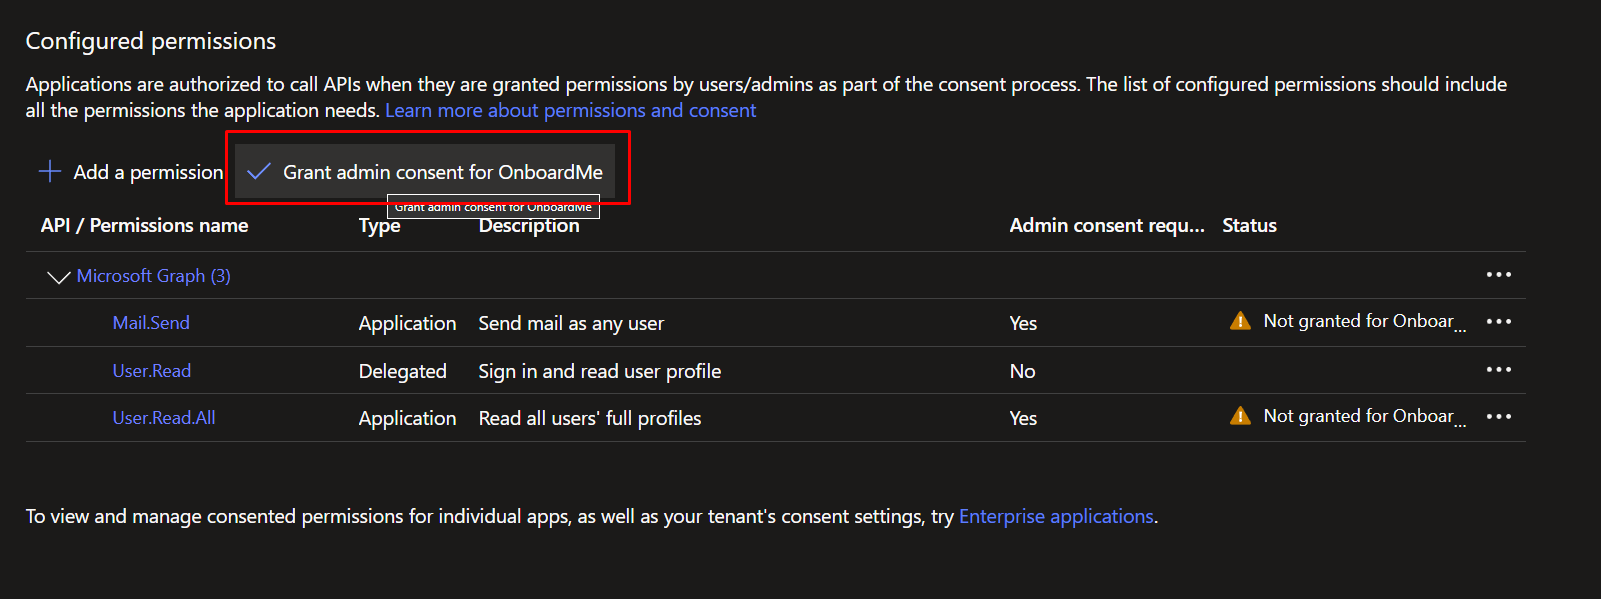
Search for "Mail.send", tick the item and say "Add Permissions".
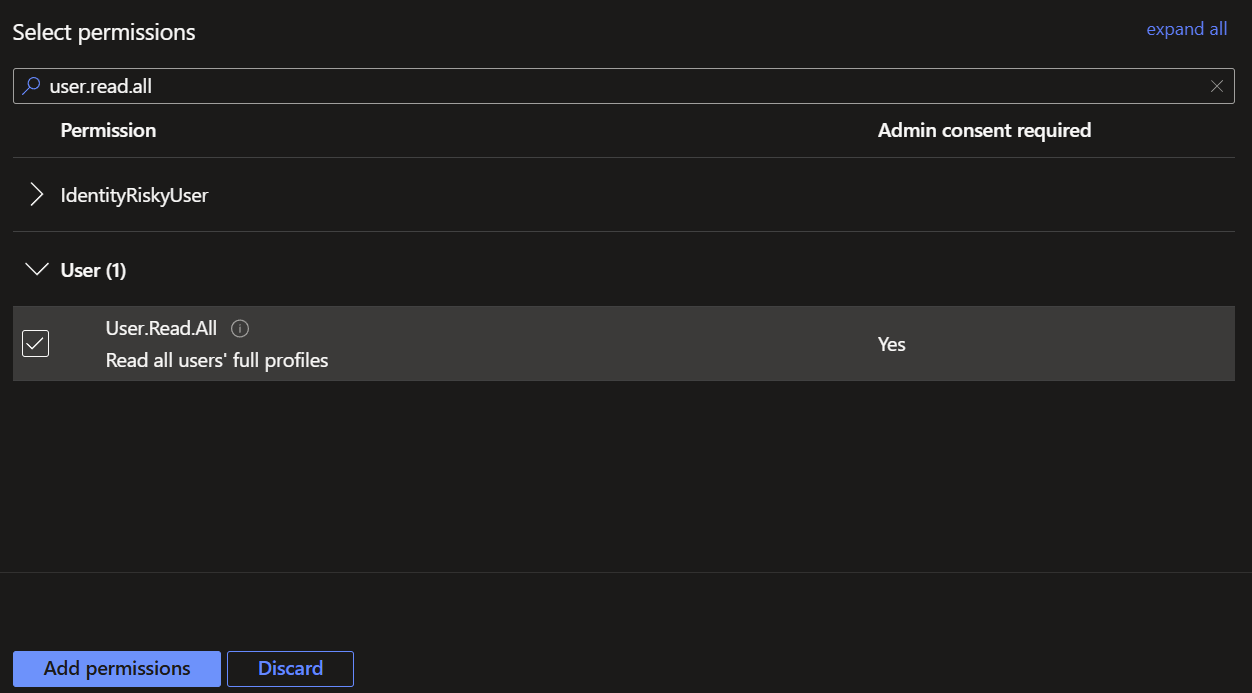
Do the same process for the User.Read.All option.
Once completed, you will need to "Grant Admin consent for XXXX", XXXX being your business name.
Once consent has been granted, navigate back to the app Overview page.
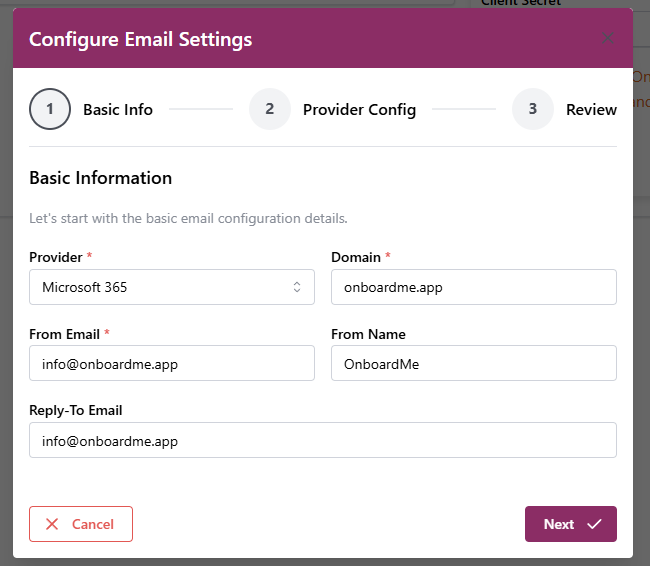
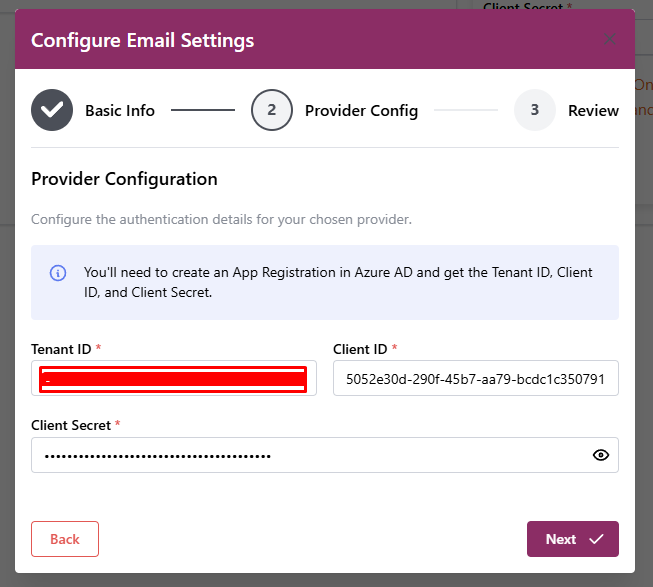
In order to send emails from OnboardMe, we need the following:
- Domain
- From Email
- From Name
- Reply-To Email
- TenantID
- ClientID (App ID)
- Client Secret
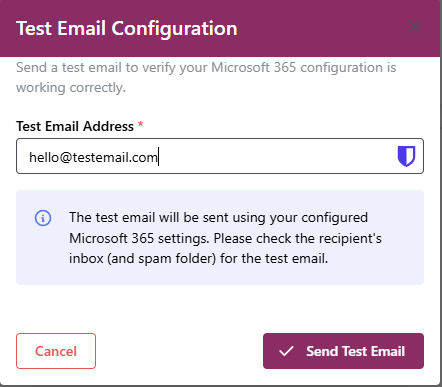
Once settings are added into OnbaordMe, you can click the Test email button.
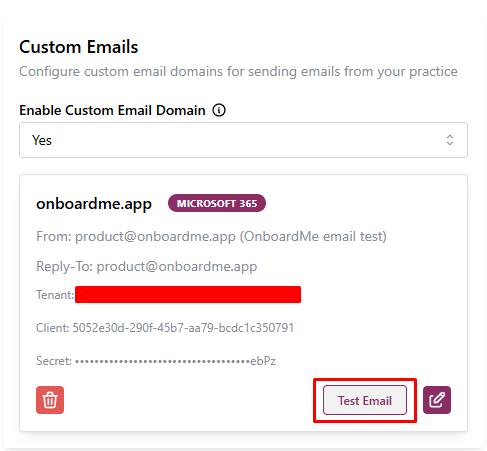
Enter an email address and click Send Test Email.