Activate Microsoft Single Sign-On
OnboardMe lets you replace local usernames + passwords with Microsoft Single Sign-On
The process has two parts:
- Register a new application in Microsoft Entra ID (Azure AD).
- Copy three values (SSO URL, Client ID, Client Secret) into OnboardMe and enable the switch.
Tip: You’ll need an Azure account with Cloud Application Administrator, Application Administrator, or Global Administrator rights, plus OnboardMe administrator access. If you outsource IT, forward these instructions to them.
Part 1 — Create an app registration in Microsoft
Sign in to the Microsoft Azure admin centre - App registrations - Microsoft Azure
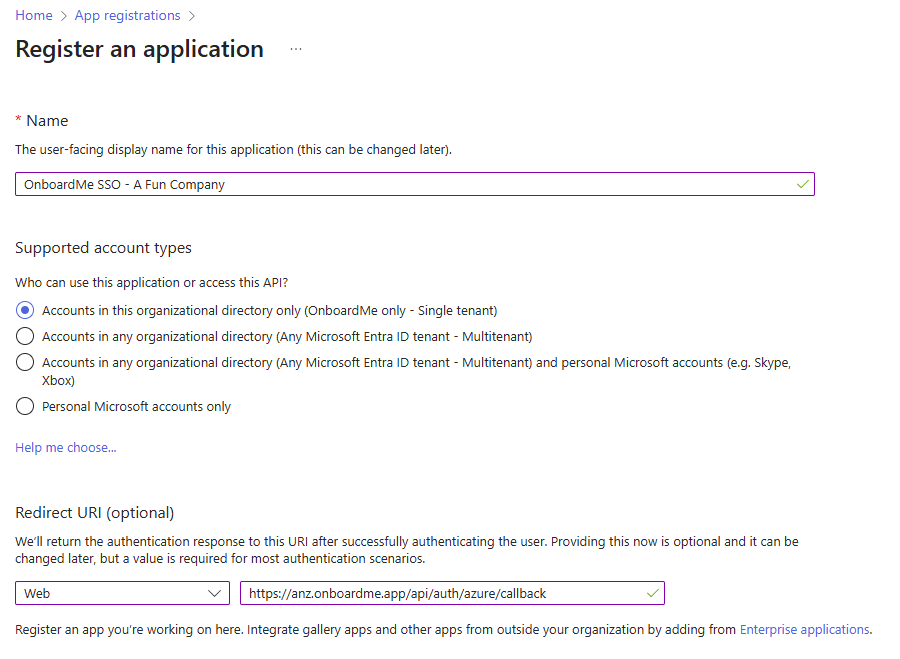
Click New registration.

Name the app (e.g. OnboardMe SSO – <Your Firm>).
Supported account type: choose Accounts in this organisational directory only (single-tenant).
Redirect URI (Web): paste the unique OnboardMe link: https://anz.onboardme.app/api/auth/azure/callback
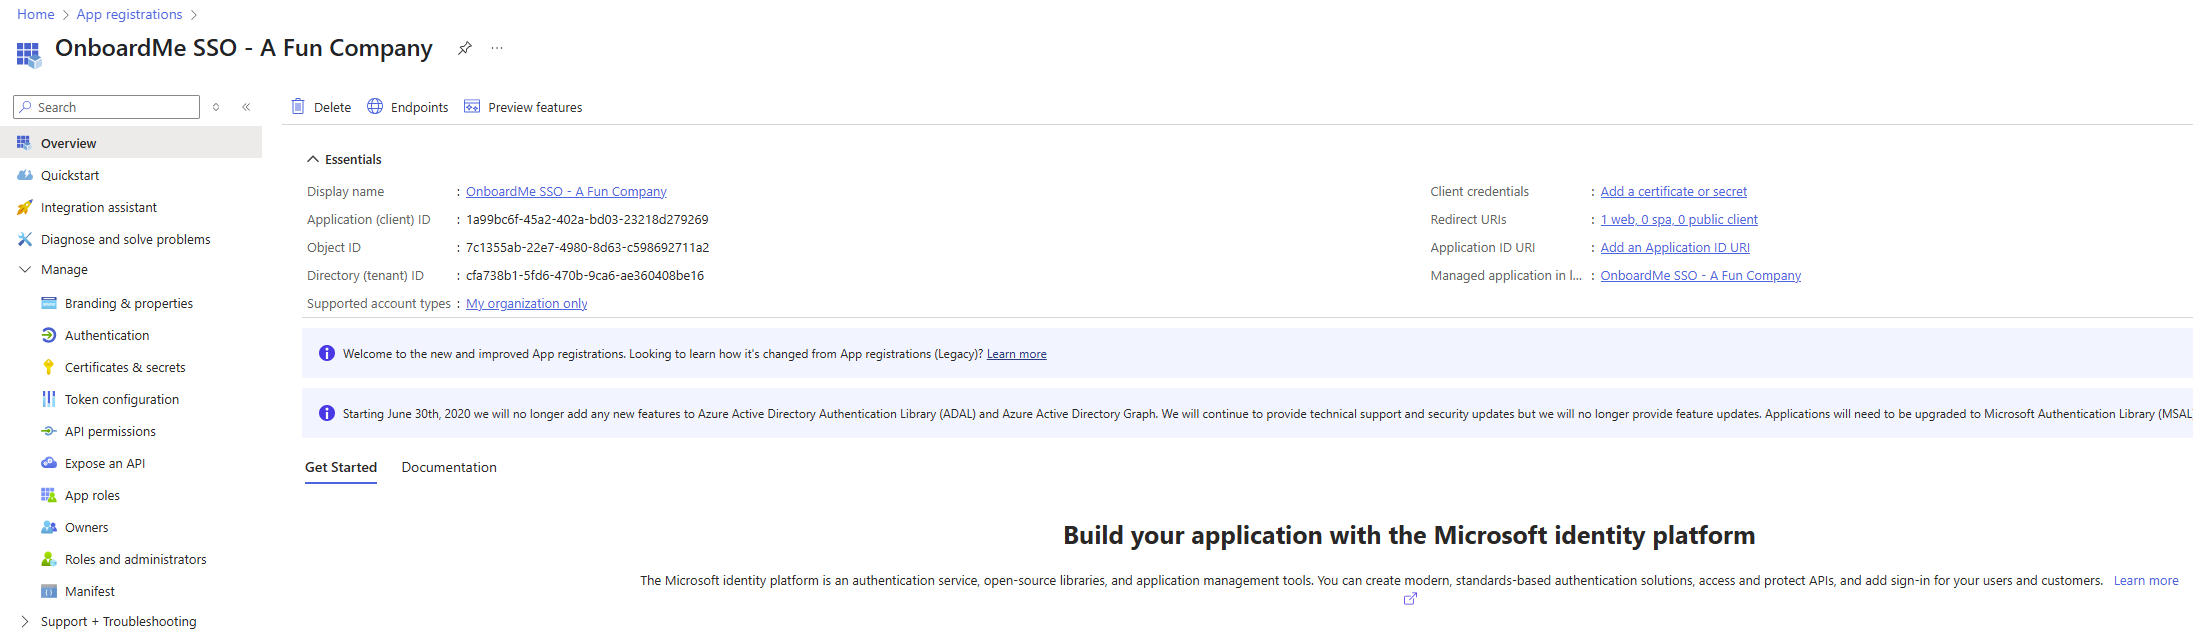
Click Register. Azure creates the app and shows its Application (-/Client) ID and Directory (-/Tenant) ID on the Overview page.
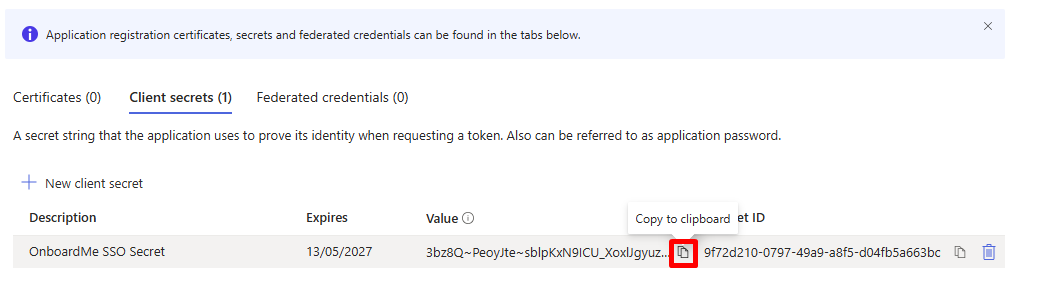
Part 2 — Add a client secret
In the new app’s blade, go to Manage ▸ Certificates & secrets ▸ Client secrets.
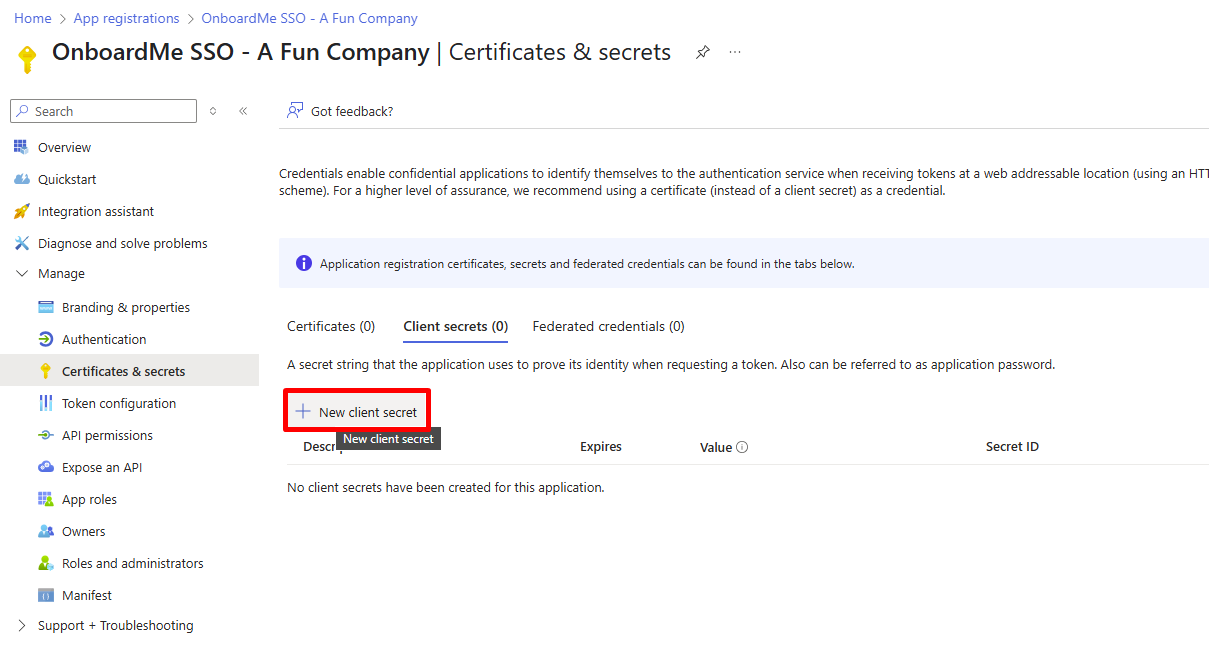
Click New client secret → add a description and expiry → Add.
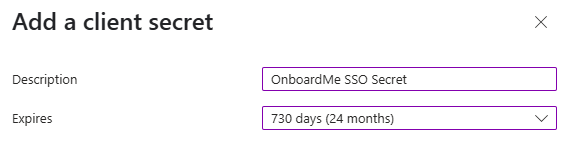
NOTE: We recommend setting the expiry to 24 Months to allow the least amount of change and disruption but ultimately you and your IT team can decide on the expiry date that suits your security preferences.
Copy the value immediately; Azure hides it after you leave the page.
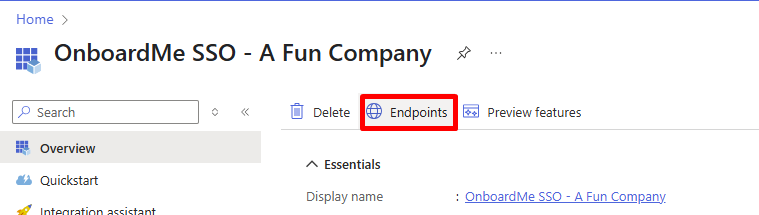
Part 3 — Collect the three values you need
| OnboardMe field | Where to find it in Azure |
|---|---|
| SSO URL | From Overview ▸ Endpoints, copy the OAuth 2.0 v2.0 token endpoint and remove everything after /v2.0. It will look like:https://login.microsoftonline.com/<TenantID>/oauth2/v2.0 |
| Client ID | Application (-/Client) ID on the Overview page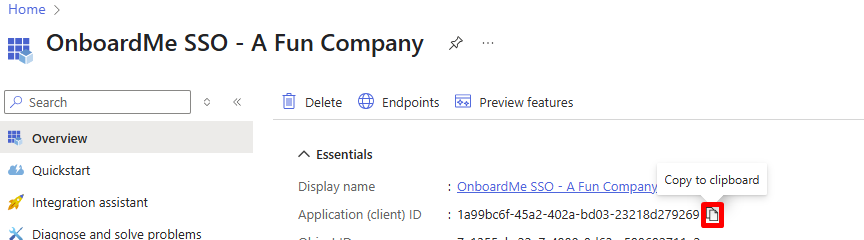 |
| Client Secret | The secret value you copied in Part 2 |

Part 4 — Enter the details in OnboardMe
Open OnboardMe → Settings ▸ Business ▸ Email & SSO Settings.
In the Microsoft Single Sign-On Settings card:
Tick Enable Microsoft Single Sign-On.
Paste SSO URL, Client ID, and Client Secret into their fields.
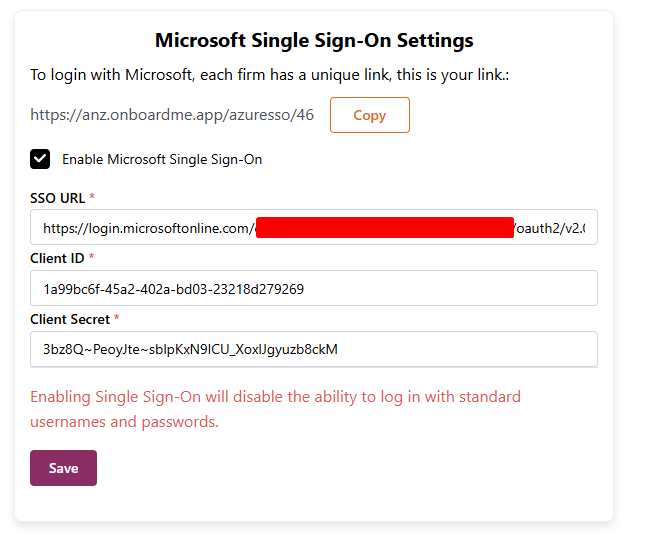
Click Save on the card.
NOTE: Enabling Single Sign-On will disable the ability to login with standard usernames and passwords.
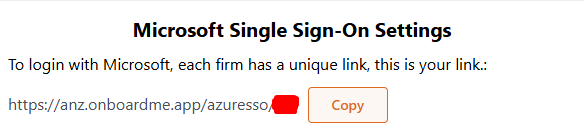
Part 5 — Test the new login
Copy the unique login link shown at the top of the card (e.g. https://anz.onboardme.app/azuresso/123).
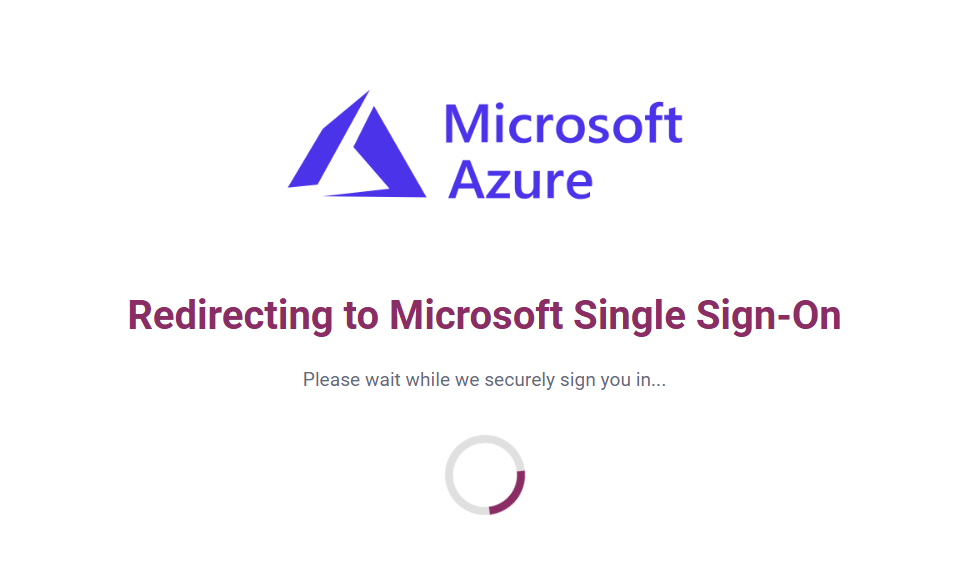
Open the link in a new browser window. If all the settings can be verified, OnboardMe will automatically redirect you to the Microsoft Login page.
Sign in with a Microsoft account from your organisation.
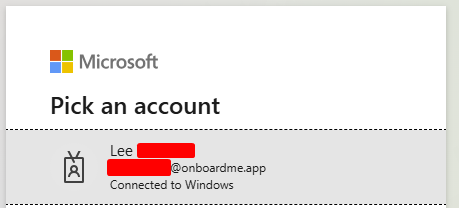
If you’re redirected into OnboardMe Dashboard without errors, SSO is active.
Roll out the link to your staff or embed it in your intranet.
If you have issues with setup or have lost your link, please contact our support team.
Troubleshooting
| Symptom | Likely cause / fix |
|---|---|
| “AADSTS50011: The reply URL specified is not registered.” | The Redirect URI in Azure doesn’t exactly match your OnboardMe SSO link—add the correct URI and save. |
| Looping back to Microsoft sign-in | Ensure the Enable Microsoft Single Sign-On checkbox is ticked and saved. |
| Consent prompt every login | Grant organisation-wide consent: Azure portal → API permissions ▸ Grant admin consent. |
| Invalid client secret | The secret was regenerated or expired—create a new one, update OnboardMe, and save. |
FAQs
Can I disable SSO later?
Yes—untick Enable Microsoft Single Sign-On and click Save. Users can then sign in with their OnboardMe passwords again.Does this set up 2-factor authentication (2FA)?
Entra ID policies (e.g., Conditional Access, MFA) apply automatically.